Water Heater Installation: Complete Guide to System Setup, Plumbing Connections, Safety, and Maintenance
A reliable water heater is an essential part of every modern home, providing hot water for bathing, cooking, cleaning, and other daily activities.
Whether you're installing a new unit in a newly constructed home or replacing an existing system, understanding the installation process helps ensure safe operation and dependable performance.
Water heater installation involves more than connecting pipes and power sources. Proper planning, system selection, plumbing connections, ventilation, and routine maintenance all contribute to efficient operation and a longer equipment lifespan. This guide explains the different types of water heaters, installation requirements, key components, maintenance practices, and common installation considerations.
What Is Water Heater Installation?
Water heater installation is the process of positioning, connecting, and configuring a water heating system so it can safely supply hot water throughout a building. The installation includes connecting the water supply, plumbing system, power source or fuel connection, temperature controls, and safety devices.
A properly installed water heater supports consistent hot water delivery while protecting the plumbing system and improving overall household convenience.
Why Proper Water Heater Installation Matters
Installing a water heater correctly offers several important benefits:
- Supports reliable hot water availability
- Improves plumbing system performance
- Promotes safe operation
- Helps maintain consistent water temperature
- Supports efficient water heating
- Reduces the risk of leaks
- Extends equipment lifespan
- Simplifies future maintenance
Types of Water Heaters
Different properties require different water heating solutions.
Storage Tank Water Heater
Stores heated water in an insulated tank and supplies it when needed.
Tankless Water Heater
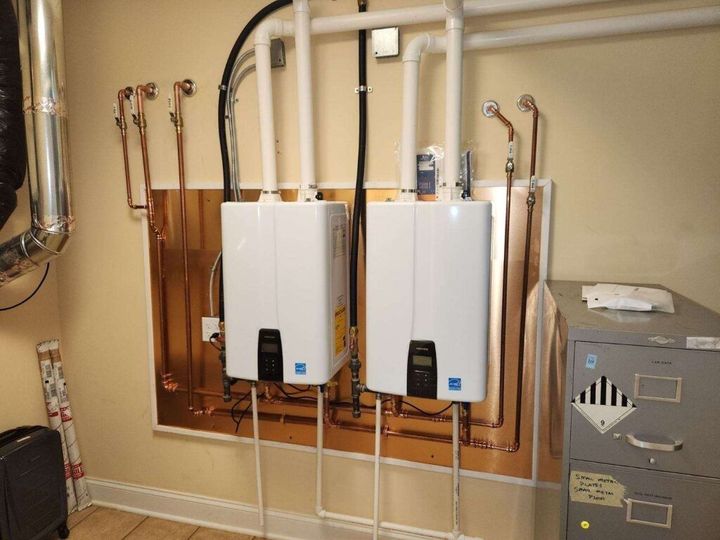
Heats water only when required, providing continuous hot water without storing it.
Heat Pump Water Heater
Transfers heat from surrounding air to warm water inside the storage tank.
Solar Water Heater
Uses solar collectors to heat water with renewable energy.
Condensing Water Heater
Designed for homes with high hot water demand and compatible fuel systems.
Main Components of a Water Heater
Understanding system components helps simplify installation and maintenance.
Storage Tank
Holds heated water until it is needed.
Heating Element or Burner
Generates heat for the water inside the tank.
Thermostat
Controls the desired water temperature.
Temperature and Pressure Relief Valve
Releases excess pressure to improve system safety.
Cold Water Inlet
Allows fresh water to enter the tank.
Hot Water Outlet
Delivers heated water to household fixtures.
Drain Valve
Used for flushing sediment and routine maintenance.
Expansion Tank
Helps absorb pressure changes in certain plumbing systems.
Preparing for Water Heater Installation
Proper preparation helps ensure a smooth installation process.
Choose the Right Capacity
Select a water heater based on household size and expected hot water usage.
Verify Installation Location
Choose an area that provides:
- Stable flooring
- Adequate ventilation
- Convenient plumbing access
- Easy maintenance access
- Protection from freezing temperatures
- Sufficient clearance around the unit
Gather Installation Tools
Common tools include:
- Pipe wrench
- Adjustable wrench
- Pipe cutter
- Screwdrivers
- Measuring tape
- Teflon tape
- Pipe fittings
- Level
Step-by-Step Water Heater Installation
Step 1: Turn Off Utilities
Shut off the water supply and disconnect electrical power or fuel before beginning.
Step 2: Remove the Existing Unit
Disconnect plumbing connections and carefully remove the old water heater if replacing one.
Step 3: Position the New Water Heater
Place the new unit on a level, stable surface with sufficient clearance.
Step 4: Connect the Plumbing
Install the cold water inlet and hot water outlet using appropriate plumbing connections.
Step 5: Install Safety Components
Connect the temperature and pressure relief valve and any required expansion tank.
Step 6: Connect the Power Source
Connect electrical wiring or fuel supply according to the manufacturer's installation requirements.
Step 7: Fill the Tank
Open the water supply and allow the tank to fill completely before powering the unit.
Step 8: Test the System
Inspect all plumbing connections, verify proper operation, and check for leaks.
Plumbing Connection Considerations
Correct plumbing installation supports long-term performance.
Important considerations include:
- Secure pipe fittings
- Proper water pressure
- Leak-free connections
- Correct inlet and outlet orientation
- Adequate drainage
- Accessible shut-off valves
Safety Considerations
Safe installation is essential for reliable operation.
Recommended safety practices include:
- Turn off utilities before installation.
- Verify electrical connections.
- Ensure proper ventilation for fuel-powered units.
- Install pressure relief devices correctly.
- Inspect all plumbing connections.
- Follow local plumbing and building regulations.
Benefits of Proper Installation
A correctly installed water heater offers several advantages.
Reliable Hot Water Supply
Provides consistent hot water throughout the home.
Improved Plumbing Performance
Supports stable water flow and temperature.
Simplified Maintenance
Proper installation makes future inspections easier.
Enhanced Safety
Correct installation reduces operational risks.
Longer Equipment Life
Proper setup helps minimize unnecessary wear.
Common Installation Challenges
Some installations may require additional planning.
Examples include:
- Limited installation space
- Outdated plumbing connections
- Low water pressure
- Ventilation limitations
- Incorrect pipe sizing
- Electrical compatibility concerns
Careful preparation helps reduce these challenges.
Routine Maintenance Tips
Regular maintenance helps maintain system performance.
Recommended practices include:
- Flush the tank periodically.
- Inspect plumbing connections.
- Test the pressure relief valve.
- Check for leaks.
- Remove sediment buildup.
- Verify thermostat settings.
- Inspect insulation around exposed pipes.
Best Practices for Long-Term Performance
To maximize water heater reliability:
- Inspect the unit regularly.
- Monitor water temperature settings.
- Keep the installation area clean.
- Check for unusual noises.
- Schedule routine plumbing inspections.
- Replace worn components when necessary.
Future Trends in Water Heater Technology
Modern water heaters continue to evolve with smart temperature controls, Wi-Fi connectivity, leak detection, energy monitoring, predictive maintenance, and integration with smart home systems. These advancements provide greater convenience, improved system monitoring, and enhanced control over household hot water management.
Frequently Asked Questions
How long does water heater installation typically take?
Installation time varies depending on the system type, plumbing configuration, and whether an existing unit is being replaced.
Can a water heater be installed in any location?
It should be installed in a location with proper plumbing access, ventilation (if required), adequate clearance, and a stable surface.
Why is a temperature and pressure relief valve important?
It helps protect the system by releasing excess pressure and maintaining safe operation.
How often should a water heater be maintained?
Routine inspections and periodic maintenance help support reliable performance throughout the year.
What should I check after installation?
Inspect for leaks, verify water temperature, confirm plumbing connections, and ensure the system operates correctly.
Conclusion
Water heater installation is an important step in creating a dependable household hot water system. Understanding system types, installation procedures, plumbing connections, safety requirements, and maintenance practices helps ensure reliable operation and long-term performance. With proper installation and routine care, a water heater can provide consistent hot water while supporting the efficiency and reliability of the home's plumbing system.